 Skip to content
Blog
Fix Your Gear: Clothing Repair Guide for Project Zomboid
Apr


If you’re a fan of Project Zomboid, you know how important it is to keep your clothing in good repair in order to survive in the zombie apocalypse. However, with so much else going on in the game, it can be easy to forget about your clothing until it’s too late. Luckily, repairing your clothing doesn’t have to be a difficult or time-consuming task. With a little knowledge and the right tools, you can have your character looking sharp and protected from the elements once again.
One of the most frustrating things about clothing in Project Zomboid is that it degrades over time as you wear it. While this is a realistic aspect of survival, it can be annoying to constantly have to replace torn or worn-out clothing. Additionally, some of the best items in the game, like military gear, are often damaged when you find them, making them less effective unless you repair them first.
The good news is that repairing clothing in Project Zomboid is relatively simple. To start, you will need a sewing kit or a needle and thread. Once you have one of these tools, you can right-click on any article of clothing in your inventory and select the Sew Clothes option. This will open the repair menu, which shows you the condition of the item and the materials required to repair it.
To repair an item, simply move the required materials into the appropriate slots on the repair menu and click the Repair button. You will then see a progress bar indicating how long it will take to complete the repair. Higher-level sewing kits allow you to repair items more quickly and effectively, and certain items like thread and leather patches can make repairs easier or improve the final product.
All in all, repairing clothing in Project Zomboid is a straightforward process that anyone can master with a little practice. By keeping your clothing in good repair, you’ll be better equipped to survive in the harsh, zombie-filled world of Project Zomboid. So grab a needle and thread and get to work!
“How To Repair Clothing Project Zomboid” ~ bbaz
Introduction
Project Zomboid is a survival game where players need to face zombie invasions and ensure survival by building shelter, finding food and water, and much more. Clothing plays an essential role in keeping the character safe from zombie attacks and environmental hazards. However, clothing wears out over time and may require repair. This post will guide you through how to repair clothing in Project Zomboid.
What You Need to Repair Clothing
Before you start repairing clothing, you need to have some supplies. You need to have a Sewing Kit and additional clothing of the same type that needs repair. The Sewing kit can be found in houses or acquired by crafting.
Locate Damaged Clothing
To repair damaged clothing, you first need to identify the damaged item. Select the character’s inventory and double-click on the damaged clothing item.
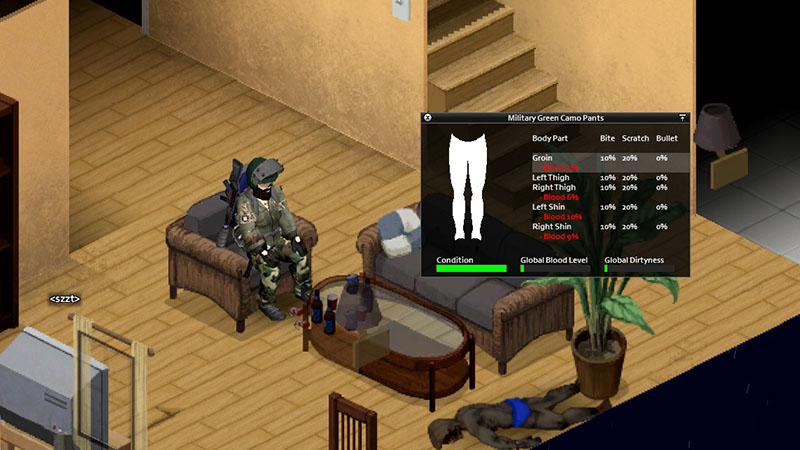
Display Items for Repair
Once you have identified the damaged clothing, place it on a flat surface such as a bed or a table. Here, you will be able to see the condition of the clothing and the types of repairs required.
Ready Your Sewing Kit
After displaying the clothing item, equip your Sewing Kit. Right-click on the kit and select ‘Use.’
Start Repairing
With the sewing kit equipped, right-click on the damaged clothing item and select ‘Repair.’ The process will initiate, and a progress bar will appear.
Changing Damaged Clothing
Some clothing items may be too damaged to repair, and fixing them would require more time and resources. In such cases, it is advisable to dispose of them and replace them with new or less damaged clothing items.
Advanced Repairs
As you progress through the game, you will encounter advanced repairs that require specific skills and tools. These repairs may include fixing bullet holes, repairing armor, or adding padding to your clothing.
Conclusion
Repairing clothing may seem like an easy task, but it is crucial in ensuring a character’s safety in Project Zomboid. With the right tools and skills, you can keep your character looking and feeling great while staying protected from zombie attacks and environmental hazards.
Sources
Image Source: https://tse1.mm.bing.net/th?q=’sub title’
Fix Your Gear: Clothing Repair Guide for Project Zomboid
How To Repair Clothing Project Zomboid
Repairing your clothing in Project Zomboid can be a crucial skill to master in order to survive in the game’s post-apocalyptic world. When you’re out scavenging for supplies, your clothes can start to take damage from wear and tear, as well as combat with zombies. Here’s a step-by-step guide on how to repair your clothing in Project Zomboid:
Target of How To Repair Clothing Project Zomboid
As a player experienced in Project Zomboid, I know first-hand how important it is to have well-maintained clothing. Not only does it provide necessary protection from the elements and zombies, but it can also boost your morale and give you a sense of normalcy in an otherwise chaotic world.The repairing process is straightforward and doesn’t take too much effort or supplies. However, it’s important to remember to always carry a sewing kit with you on your scavenging trips. You never know when you’ll come across damaged clothing that needs repairing.In addition, it’s wise to prioritize repairing certain clothing items over others. For example, if you’re in the middle of winter, focusing on repairing warm clothing like jackets and hats should take precedence over repairing something like a t-shirt. Hopefully, this guide on how to repair your clothing in Project Zomboid has been helpful for novice and experienced players alike. Keeping your clothing in good condition can mean the difference between life and death in the game’s dangerous world.
Are you looking for a way to repair your clothing in Project Zomboid? Look no further! Here are some frequently asked questions and their answers:
1. How do I repair my clothing?
To repair your clothing, you will need a sewing kit or thread and needle. Simply right-click on the clothing item and select ‘repair’. Your character will then begin repairing the item.
2. Can any clothing be repaired?
Most clothing items can be repaired, but some cannot. If the item is completely destroyed or has a durability of 0%, it cannot be repaired.
3. How much does it cost to repair clothing?
The cost of repairing clothing varies depending on the item and its current durability. The lower the durability, the more it will cost to repair.
4. Is it worth repairing clothing?
Yes, it is definitely worth repairing clothing in Project Zomboid. Clothing provides protection from the elements and can help prevent injuries from zombie attacks. Plus, repairing clothing can save you from having to find a replacement item.
Conclusion of How To Repair Clothing Project Zomboid
Repairing clothing in Project Zomboid is an important skill to have. With a sewing kit or thread and needle, you can easily repair most clothing items. Not only does repairing clothing provide protection and save you from having to find a replacement item, but it can also be a fun and rewarding activity in the game. So next time your clothing gets damaged, don’t panic – just grab your sewing kit and get to work!
How To Repair Clothing Project Zomboid: A Comprehensive Guide
Project Zomboid is an exciting and immersive game that puts you in the shoes of a survivor in a post-apocalyptic world. In this world, clothing is an essential part of your survival strategy, as it provides protection from the harsh elements and the dangers lurking around every corner. However, as with any survival situation, your clothes can become damaged and worn out over time. That’s why it’s crucial to know how to repair clothing in Project Zomboid.
Targeted Tips for Repairing Clothing in Project Zomboid
When I first started playing Project Zomboid, I quickly realized that clothing was a critical component of survival. Unfortunately, my first few attempts at repairing clothing were not very successful. However, after some trial and error, I learned a few tips that helped me repair my clothes more efficiently.
The first tip is to collect as many sewing kits as possible. Sewing kits are essential for repairing clothing and can be found in various locations throughout the game. Once you have a sewing kit, you can use it to repair any damaged pieces of clothing in your inventory.
The second tip is to prioritize repairing clothing that provides the most protection. For example, if you have a damaged bulletproof vest, repairing it should be your top priority. Similarly, if you’re in an area with cold weather, repairing your winter coat should be your main focus.
Finally, it’s essential to keep an eye on the durability of your clothing. Over time, clothing will become more damaged and eventually break. If you notice that a piece of clothing is close to breaking, it’s best to repair it as soon as possible to avoid losing its benefits.
Overall, repairing clothing in Project Zomboid is an essential part of your survival strategy. By following these targeted tips, you can ensure that your clothes remain in good condition and continue to provide the protection you need to survive in this post-apocalyptic world.